Looking for a festive and eco-conscious way to decorate your next celebration? Creating recycled fabric banners for parties is a fun, affordable, and sustainable DIY project that adds charm to birthdays, weddings, baby showers, and more. With a few simple materials and a bit of creativity, you can transform fabric scraps into beautiful decorations while reducing waste.
Why Choose Recycled Fabric Banners?
Recycled fabric banners are gaining popularity among eco-conscious hosts, and for good reason:
- Eco-friendly: They repurpose textile waste that might otherwise end up in landfills.
- Cost-effective: Uses materials you already have, like old clothes or curtains.
- Reusable: Unlike paper or plastic décor, these banners can be used multiple times.
- Customizable: Choose colors, patterns, and shapes that match your party theme.
Best Fabrics to Use for DIY Banners
You can use virtually any soft, lightweight fabric, but here are some ideal sources:
- Old t-shirts
- Worn-out bed sheets
- Fabric scraps from sewing projects
- Outdated curtains or tablecloths
- Baby clothes or handkerchiefs with sentimental value
Materials You’ll Need
To get started, gather the following items:
- Recycled fabric (washed and ironed)
- Fabric scissors or rotary cutter
- Ruler or measuring tape
- Pencil or fabric chalk
- Twine, ribbon, or string for hanging
- Needle and thread or fabric glue
- Optional: pinking shears, hot glue gun, decorative trims
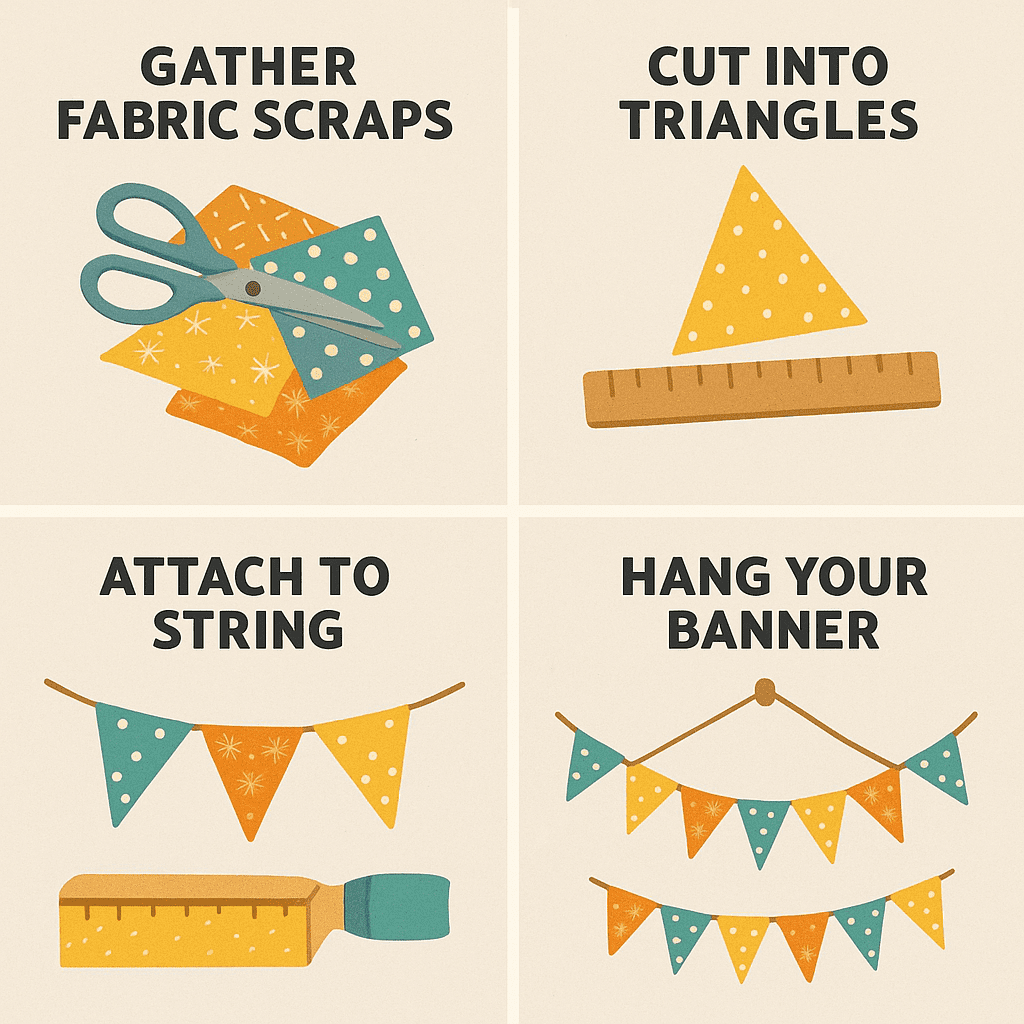
Step-by-Step Instructions
Step 1: Select and Prepare Your Fabric
Choose a variety of colors and patterns for visual interest. Wash and iron the fabric to remove wrinkles and make cutting easier.
Step 2: Cut the Fabric into Shapes
Use a ruler to draw and cut triangle or pennant shapes. A typical banner triangle might be 6 inches wide at the top and 8 inches long. Use pinking shears to prevent fraying.
Step 3: Arrange Your Layout
Lay out the banner pieces in your desired order. Alternate colors and patterns to create a balanced, eye-catching look.
Step 4: Attach Fabric to String
You have two options:
- Sewing: Fold the top edge over the string and stitch.
- Gluing: Use hot glue or fabric glue to attach each piece to the twine. Leave a 1–2 inch gap between each flag.
Step 5: Add Finishing Touches
Embellish with buttons, lace, or felt letters to personalize your banner. You can also use stencils to add words like “Happy Birthday” or “Congrats.”
Step 6: Hang and Celebrate!
Hang your finished banner across walls, tables, windows, or outdoor fences. Adjust the drape for the perfect fit.
Creative Variations
Want to mix it up? Try these fun ideas:
- Themed Banners: Match the fabrics to holidays like Halloween or Christmas.
- Mini Banners: Perfect for cakes, centerpieces, or gift bags.
- Name Banners: Spell out a name or message with one letter per flag.
- Photo Display: Clip photos between the flags for a nostalgic touch.
Where to Use Your Fabric Banners
- Birthday parties
- Baby showers
- Outdoor picnics
- Graduation parties
- Reusable holiday décor
Need tools or twine for this project? Visit Michaels for a great selection of affordable and eco-friendly craft supplies.
Want more ideas for sustainable party décor? Check out our guide on recycled home decor on a budget.
Conclusion: Decorate with Purpose
Recycled fabric banners are more than just cute decorations—they’re a small but impactful way to celebrate sustainably. Whether you’re hosting a birthday bash or an intimate backyard gathering, these handmade banners add a heartfelt and personal touch. Plus, you’ll feel great knowing you’re reusing materials and reducing waste.
Save this idea for your next celebration—or share it with a friend who loves DIY crafts!
FAQ: Recycled Fabric Banners
Q1: Can I make a fabric banner without sewing? Yes! Fabric glue or a hot glue gun works well and is beginner-friendly.
Q2: How long does it take to make a banner? About 1 to 2 hours depending on the size and number of flags.
Q3: Can I wash and reuse the banner? If sewn, yes. Avoid washing glued banners to preserve their durability.
Written by Kate Smith | Plant Care Enthusiast & Urban Gardener