Staying organized in a tech-filled home can be challenging. A charging station from shoeboxes is a practical and eco-friendly solution to keep all your devices neatly powered in one place. With a few simple tools and recycled materials, you can build your own customized setup that reduces clutter and adds charm to your space.
Why Create a DIY Charging Station?
As homes become increasingly connected, charging cables often turn into a messy tangle. Commercial organizers can be costly and impersonal. A DIY shoebox solution solves both problems affordably and creatively.
Benefits:
- Cost-effective: Uses recycled materials you already have.
- Customizable: Design it to match your style or room.
- Eco-friendly: Reduces waste by reusing household items.
- Practical: Keeps multiple devices and cables neatly in one place.
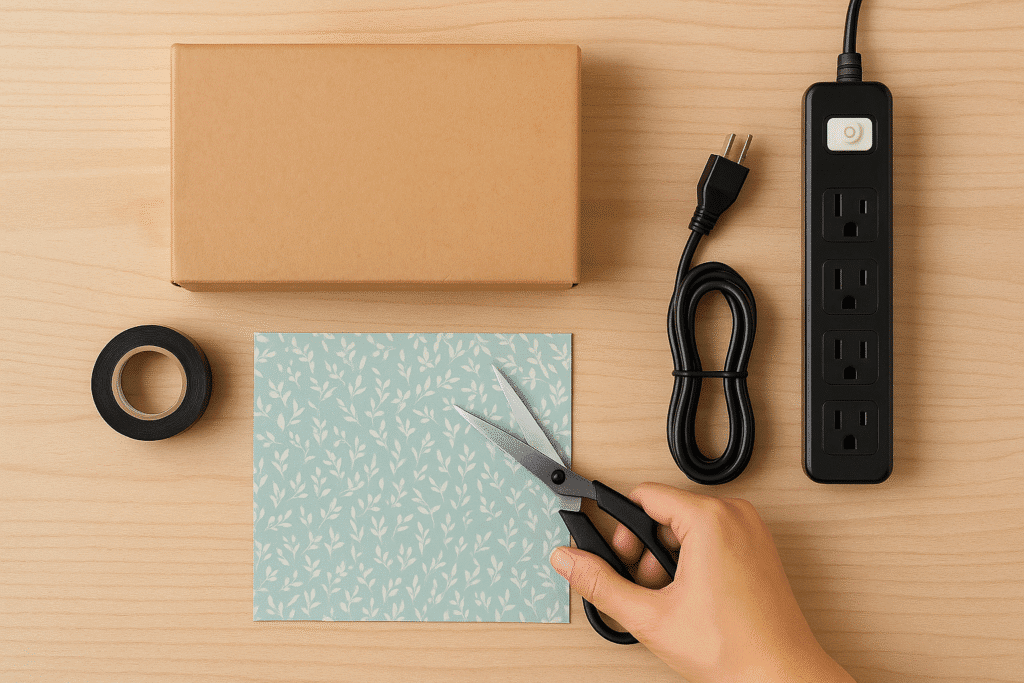
Materials Needed
Here’s what you’ll need for this project:
- 1–2 sturdy shoeboxes
- Craft knife or scissors
- Decorative paper or contact paper
- Ruler and pencil
- Hot glue gun or tape
- Power strip or USB charger
- Cable clips or twist ties
- Optional: rubber grommets for a polished cable finish
You can purchase glue guns, decorative paper, and cable organizers at Michaels – Craft Supplies & Organizers.
Step-by-Step Guide: Build a Charging Station
Step 1: Choose and Clean the Box
Pick a medium-sized shoebox that fits your devices side by side. Clean it to remove any debris or labels.
Step 2: Mark and Cut Cable Openings
Use a pencil and ruler to mark holes where charging cables will come out. Cut with a craft knife. Add rubber grommets or washi tape to clean the edges.
Step 3: Decorate the Box
Cover the shoebox in wrapping paper or adhesive vinyl to match your décor. You can also label sections with names or devices.
Step 4: Insert the Power Strip
Place the power strip or USB charger inside the box. Use hot glue or adhesive pads to keep it secure.
Step 5: Organize and Thread the Cables
Thread the cables through the holes and plug them into the charger. Use twist ties or cable clips to keep them neat.
Step 6: Add Dividers (Optional)
Create cardboard dividers inside to separate phones, tablets, or other devices. Cover them with tape or fabric for a finished look.
Personalization Tips
- Use labels to assign a space for each family member.
- Add felt padding inside to protect devices.
- Create a dual-level box for additional storage.
- Add a side pouch for earphones or smartwatch straps.
If you’re into smart storage hacks, don’t miss our tutorial on how to turn cereal boxes into drawer organizers.
Safety Tips
- Ensure ventilation for the power strip. Avoid enclosing heat-producing electronics.
- Don’t leave your charging station unattended for long hours.
- Unplug when not in use to prevent overheating.
Where to Use Your DIY Charging Station
- Bedroom: Perfect for nightly charging of multiple devices.
- Kitchen: Keep gadgets tidy and accessible while cooking.
- Home office: Charge phones, smartwatches, and wireless accessories.
- Entryway: A drop-off zone for family devices.
If you liked this project, you’ll also enjoy our guide on how to reuse tissue boxes for cable management.
Conclusion
Creating a charging station from shoeboxes is more than just a clever upcycling project — it’s a practical solution for everyday organization. You’ll not only save money but also enjoy a cleaner space and a unique piece of handmade decor.
🔁 Share this guide with a friend who’s just starting out!
📥 Save it for your next rainy-day project or organizing weekend.
FAQ
Can I use any box or does it need to be a shoebox?
Shoeboxes are ideal because of their size and lid, but any sturdy box works — even gift boxes or packaging cartons.
Is it safe to charge multiple devices in a cardboard box?
Yes, if the box is well-ventilated and you use certified chargers. Avoid covering the power strip entirely.
How many devices can I charge at once?
It depends on your power strip or USB hub. Most support 3–6 devices safely.
You can find decorative paper, power strips, and cable clips at Michaels – Craft & Organization Supplies.
Written by Kate Smith | Plant Care Enthusiast & Urban Gardener
[…] upcycling? Check out our easy tutorial on how to make a DIY charging station with shoeboxes — another fun way to turn trash into […]
[…] you’re into clever home storage, check out our tutorial on how to turn shoeboxes into a DIY charging station — a simple way to tidy up your […]
[…] for other clever upcycling ideas? Learn how to turn shoeboxes into a DIY charging station — a practical and stylish way to reduce clutter at […]