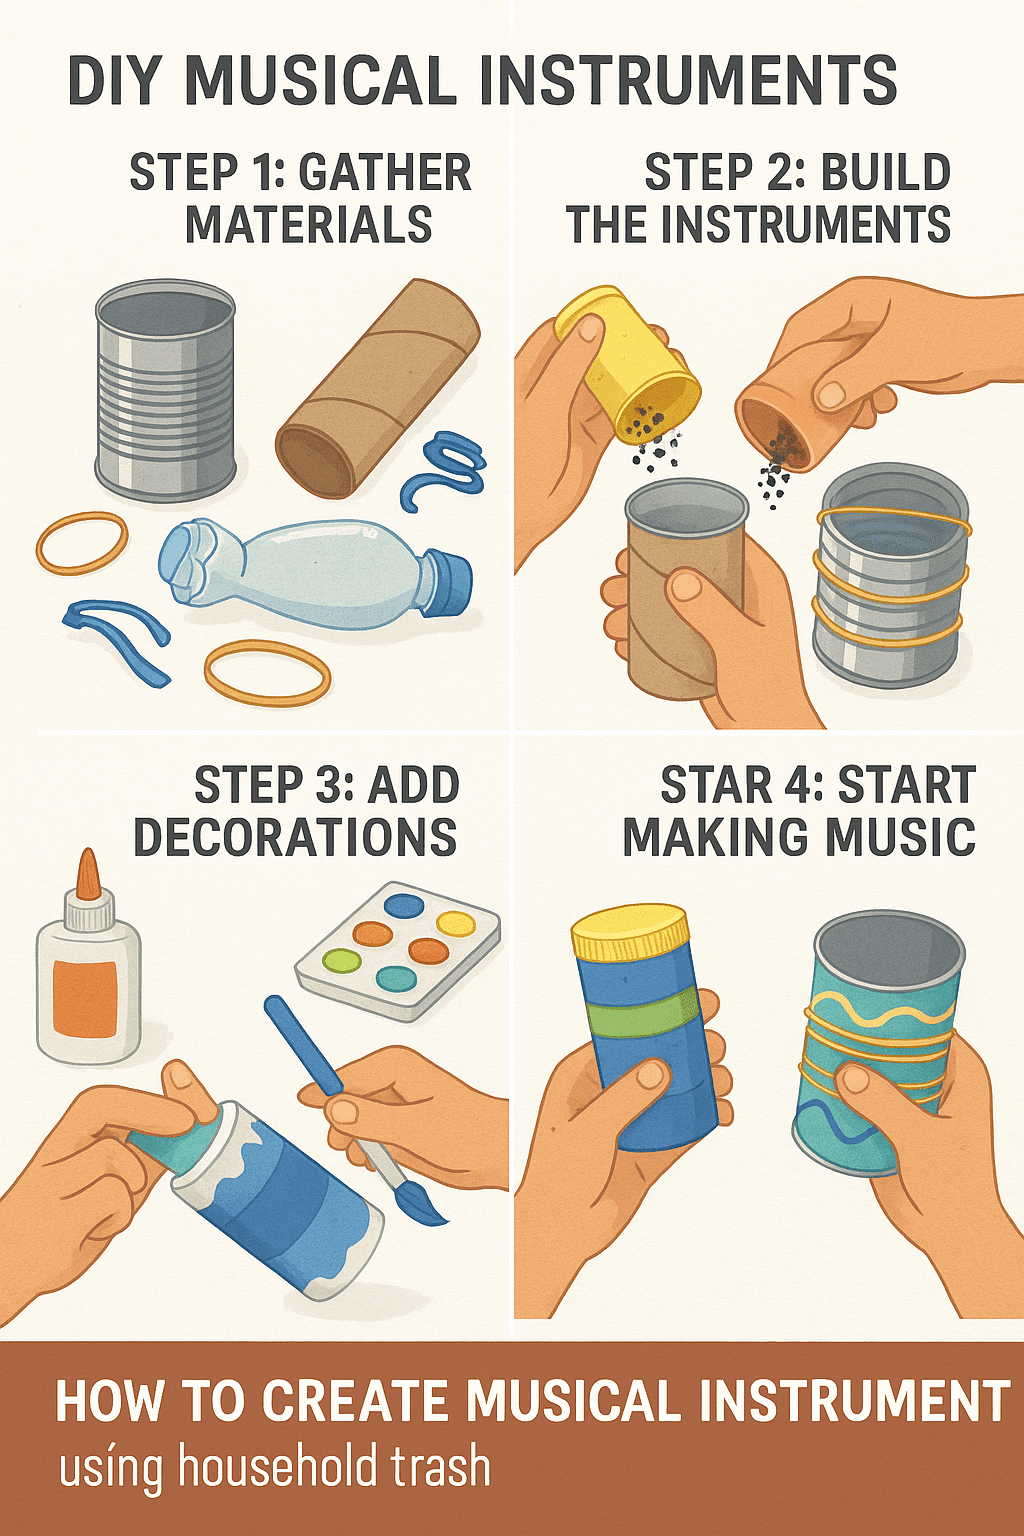
Turning household trash into DIY musical instruments is not only a fun and engaging activity, but it’s also a smart way to promote sustainability and creativity. In this guide, you’ll learn how to repurpose everyday waste items into functional, noise-making crafts that kids and adults alike can enjoy.
Whether you’re teaching music, entertaining children, or simply exploring creative recycling, these ideas offer hands-on fun while reducing landfill waste. From plastic bottles to cardboard rolls, nearly any discarded item can become part of a homemade band.
Why Make DIY Musical Instruments from Trash?
There are many benefits to creating music from reused materials:
- Eco-friendly: Reduces household waste through practical reuse.
- Budget-friendly: Saves money on buying traditional instruments.
- Educational: Teaches kids about rhythm, sound, recycling, and teamwork.
- Customizable: Designs can be as simple or as elaborate as desired.
- Inclusive: Requires no musical training to enjoy.
Moreover, these instruments make great additions to classrooms, family crafting sessions, or themed parties.
Household Items You Can Reuse
Start by gathering clean, safe items from your recycling bin or storage drawers. Here’s a quick list of commonly used materials:
- Plastic bottles (various sizes)
- Cardboard tubes (toilet paper or paper towel rolls)
- Empty tin cans (no sharp edges)
- Yogurt containers
- Shoeboxes
- Metal bottle caps
- Rubber bands
- Dried beans, rice, pasta
- Aluminum foil
- Old keys or washers
- Straws, popsicle sticks, chopsticks
Tools you may need:
- Scissors or craft knife
- Glue or tape
- Paint and markers
- String or yarn
- Stapler or hole puncher
Now let’s explore some fun and simple instrument ideas you can make right at home.
DIY Instrument Ideas and How to Make Them
1. Bottle Shakers
Materials: Empty plastic bottles, dried beans or rice, tape
Instructions:
- Clean and dry the plastic bottle thoroughly.
- Add a handful of dried beans or rice.
- Seal the cap tightly and reinforce it with tape.
- Decorate the outside using paper, markers, or paint.
- Shake to create rhythm!
Tip: Vary the filler material to create different sounds (e.g., pasta for a softer tone, coins for a metallic rattle).
2. Cardboard Tube Drums
Materials: Cardboard tubes, plastic wrap, rubber bands
Instructions:
- Cut the tube to your desired drum height.
- Stretch plastic wrap tightly over one end.
- Secure it with a rubber band.
- Decorate the outside of the tube.
- Tap gently with fingers or small sticks.
Variation: Use balloon material instead of plastic wrap for a better sound.
3. Tin Can Tambourines
Materials: Clean tin can (no lid), string, metal bottle caps, nail, hammer
Instructions:
- Puncture holes near the rim using a nail and hammer.
- String bottle caps through the holes using wire or twine.
- Tie them off securely.
- Shake to produce a metallic jingle.
Safety Note: Always smooth sharp edges before crafting.
4. Shoebox Guitars
Materials: Empty shoebox, rubber bands, scissors, cardboard tube
Instructions:
- Cut a hole in the center of the shoebox lid.
- Stretch rubber bands across the box lengthwise over the hole.
- Insert a cardboard tube into one end of the box to serve as the guitar neck.
- Decorate the entire instrument.
Sound Tip: Use different thicknesses of rubber bands for varied tones.
5. Straw Pan Flutes
Materials: Straws, tape, scissors
Instructions:
- Cut straws to different lengths.
- Line them up from shortest to longest.
- Tape them together side by side.
- Blow across the tops to make music.
Extra: Add a paper handle or base for easier holding.

Additional Creative Instrument Ideas
- Maracas: Made from plastic Easter eggs filled with rice and taped onto plastic spoons.
- Rainstick: Use a paper towel tube, fill with beans, and insert toothpicks through the sides.
- Kazoo: Stretch wax paper over one end of a toilet roll and hum into it.
Educational Uses and Benefits
Besides being fun, these DIY instruments can serve important educational purposes:
- Science: Demonstrates vibration and soundwave concepts.
- Music: Teaches rhythm, tempo, and coordination.
- Art: Encourages creativity in decorating and personalization.
- Sustainability: Reinforces recycling habits from a young age.
For teachers, parents, or program leaders, these activities combine multiple learning areas into one project.
If you enjoyed this DIY activity, explore more fun recycling projects like our Recycled Puzzle Games for Kids.
Conclusion: Create, Play, and Recycle
Making musical instruments from household trash is a rewarding way to turn “junk” into joyful sound. It’s low-cost, accessible, and surprisingly enriching for kids and adults alike.
So next time you’re about to throw something away, ask yourself: could this make music instead?
Save this guide for your next rainy-day activity — or share it with a music-loving friend!
FAQ: DIY Trash Instruments
Q1: Are these safe for children under 5?
Most are safe with adult supervision. Avoid small parts that could pose choking hazards.
Q2: How long do these instruments last?
With proper handling, they can last weeks or months. Use stronger adhesives for more durability.
Q3: Can I use these in a school music class?
Absolutely. Many educators use DIY instruments to teach basic rhythm, teamwork, and creativity.
External and Internal Resources
Need extra supplies like glue or decorations?
Shop for affordable crafting materials on Michaels.
Want more recycled craft ideas?
Check out our post on Broken Pot Garden Art.
Need supplies like rubber bands, glue, or paint for your homemade instruments? Visit Michaels Craft Store for affordable and eco-friendly crafting materials.
Written by Kate Smith | Plant Care Enthusiast & Urban Gardener
